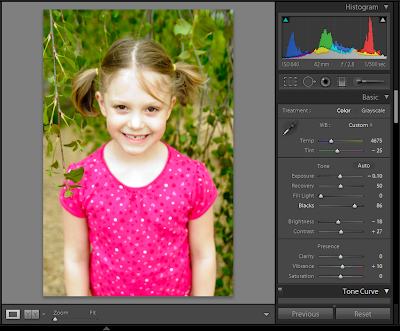
At first, I thought maybe I could just reduce the exposure. While this did improve the photo, it caused some strange contrasts on the face and cheeks.
I then tried using the recovery slider, but it only accentuated the strange contrasts.
Through trial and error, I discovered that the best solution, for this photo, was to reduce the brightness and increase the blacks quite a bit. I also fixed the white balance at this point, since I could now see what I was working with. (I would normally do this step first.)
And lastly, since my Nikon likes to do wonky things with bright pinks and reds, I made some final Lightroom adjustments to the Red Hue Saturation and Luminance.
After finishing my Lightroom edits, I opened the photo in Photoshop for some slight under-eye touch up and teeth whitening, a bit of eye pop, final sharpening, a curves adjustment to fix some background color issues and a soft light layer for a bit of pop. Here is the final before and after photo.
While the skin is still much brighter than what I would normally edit a photo, I am happy to be able to recover this photo to a usable state. (And also happy that all my photos aren't so horribly exposed and requiring so much help!! LOL!)
- The Scrappin Cop - Twine Set
- The Scrappin Cop - Twine Set #2
- The Scrappin Cop - Grungy Edge Overlays
- Royanna Fritschmann - Resolve Scrapkit
- Royanna Fritschmann - Paper Wishes Frames
- Royanna Fritschmann - Be Thankful Always Scrapkit
- Christine Mortimer - Grunged Up Overlays: Pack Four
- Fonts - A Little pot, 4990180
Have a blessed day! Thanks for stopping!


