What - Allows you to save the PSD, full resolution JPGs and 72 dpi JPGs in one step. File Save 2 has saving options for pages together and pages split apart.
What Else:
● Can specify one 300 dpi version and three 72 dpi versions of the pages together.
● Can specify one 300 dpi version and one 72 dpi version of the pages split apart.
● Original file can be any size or shape. File Save 2 calculates the appropriate height for the various copies based on the width specified.
● File Save 2 provides an option to save square layouts to an 8x10 canvas, ready for printing.
● Metadata is preserved with all copies.
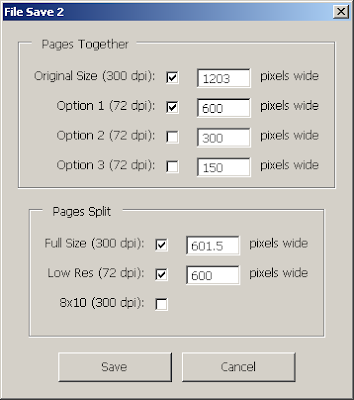
How – File Save 2 has a dialog box that prompts you for which size files to save. You make your selections and/or enter the file sizes and click save to create multiple files in one step.
When the script is run, a dialog box appears. This gives you options for what type of JPGs to save. File Save 2 uses the responses to these check boxes and the values in the 'pixels wide' fields to determine which JPGs to create.

Pages Together:
Original Size: This option defaults to the current size (width, in pixels) of the PSD. You could change it, for example, if you create at a 24x12 size (7200 pixels wide), but wanted to save your full resolution jpg at 16x8 (4800 pixels wide).
Options 1, 2, 3 – 72 dpi: These give you 3 options for saving at 72dpi. The defaults are set to 600, 300, 150 but can be changed, if desired. The size entered will be the final width of the two-page spread.
Pages Split:
Full Size: This option will split the two page spread in half and save a 300 dpi left and right page. It defaults to half the current size (width, in pixels) of the PSD. If this number is 3600, each page, left and right, will be saved at 3600 pixels wide.
Low Res – 72 dpi: This option will split the two page spread in half and save a 72 dpi left and right page. It defaults to 600 px, but can be changed, if desired.. If this number is 600, each page, left and right, will be saved at 600 pixels wide.
8x10 for Printing: This option takes a layout, where each half is square, and puts it on an 8x10 canvas, for printing purposes. The layout is positioned at the top portion of the 8x10. The script uses the current foreground color on the expanded canvas and puts a small solid color border around the top, left and right edges, so that no edge details are lost when printing.
Example:
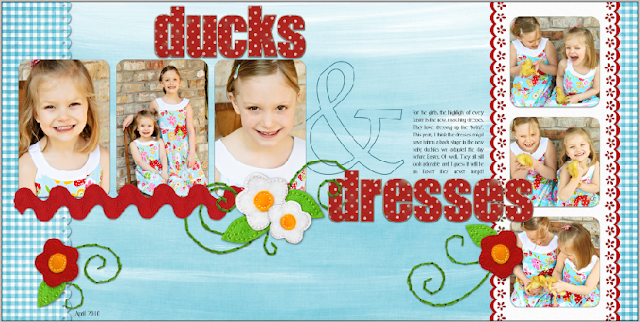
Starting layout (layered PSD 24”W x 12”H) Note: The layout must have at least one initial save before using the script.

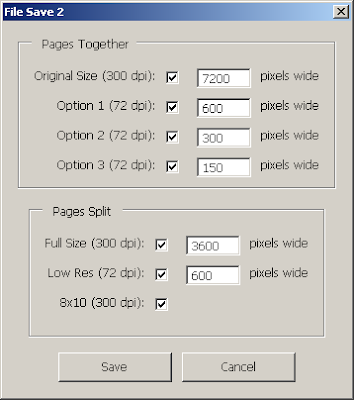
Running the script with all options selected.

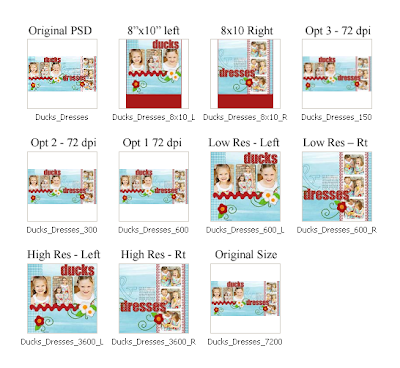
Produces these files, in the same folder location as the original PSD. The script uses the original file name and adds '_xxx', where xxx is the width (in pixels) of the file created. (Except the 8x10 version)

Layout Supplies from:
Christy VanderWall
www.ScrappinCop.com
www.atomicCupcake.com
www.zentextures.com


Absolutely brilliant. Thank you! Just what I've been looking for.
ReplyDeleteBrilliant script. Thank you so much for your generosity in sharing and your detailed instructions. Installing this now.
ReplyDeleteThank you so much for your generosity in creating and offering this script. Saves so much time!!!!!
ReplyDeleteThank you for taking the time to publish this information very useful!
ReplyDeletenescafe