Showing posts with label Scripts. Show all posts

Monday, June 7, 2010

Supply Tracking - Part 2

The first tutorial about supply tracking explained some of the reasons why a digital scrapbooker would want to keep track of supplies used on a layout and also emphasized that the first step in doing so is creating 'meaningful' layer names.

Once you have a layout complete, with layers named according to the products used, the Supply Tracker script can be used to gather them into a list. Supply Tracker puts the list of layer names in a new text layer at the top of your layout.


Supply Tracker also copies the same list of layer names to the 'Metadata' of your layout. Metadata can be seen by going to File>File Info. The list is copied to the 'Description' section of the Metadata.


If you are only tracking supplies for your own purposes, you may find this list of file names is suffice. You can simply turn off the visibility of the 'Credits' layer, or even delete it, since the same info is in the metadata. If you use the File Save (1 or 2) scripts, or use File>Save As, to save a jpg copy of your layout, the metadata will be preserved in those files as well.

NOTE: If you use the 'Save for Web' feature of Photoshop or PSE, the files created will not contain the metadata that is in your psd file.

If you are posting your layout to online galleries, submitting to magazines or listing credits on a blog, etc., your supply list will probably require some editing to make it useful to the readers. The credits and/or Metadata can be edited right in Photoshop/PSE, if desired.

After running Supply Tracker, I prefer to do my edits in Excel. To do this, I first double click on the thumbnail of the credits layer.


This highlights the entire list.


Then, I copy (Ctrl-C) the selection, open Excel, and paste (Ctrl-V) the contents of the credits list in a spreadsheet. I do this step because I find it easier to view and manipulate the data in Excel than in Photoshop.


The next thing I do is clean up the data by deleting any duplicate product names or data that isn't related to supply tracking, leaving only one row for each product I need to give credit to. I also add anything that I may have missed when creating 'meaningful' layer names - like fonts or additional scripts used.


The last step is to 'convert' file names to product names. The column next to the original list makes a great place for this.


Now, the 'cleaned up' supply list can be copied and pasted back to the layout or to your blog or gallery post. To do this, highlight the new list in excel and copy (Ctrl-C) the data.


To paste the new list to the metadata of your layout, go to File>File Info. Highlight all the existing data in the 'Description' field and press Ctrl-P to paste the new data, overwriting the old list.


Lastly, don't forget to save your psd file, to preserve your new, cleaned up supply list! :)

Next time, I will share some additional ideas for using Excel to keep track of supplies that you own and how to use the spreadsheet and Supply Tracker to easily create a credits list.

Til next time! :)

Thursday, May 20, 2010

Supply Tracking – Part 1

Tracking digital scrapbooking supplies is almost equivalent to housekeeping. It isn’t something most people enjoy doing, but it is often necessary. In this series of tutorials, you will find some tips and tricks to make your digital housekeeping supply tracking a bit easier.

There are many benefits to keeping an inventory of the supplies you have purchased (or own) as well as keeping track of which supplies you use on a given layout or project. Here are a few that I can think of:

  • Prevent duplicate purchases
  • Give proper credit when posting to galleries or blogs
  • Give proper credit when submitting to magazines or other publications
  • Give proper credit when creating Digital Scrapbooking Supplies or working on a creative team
  • Easily determine what product was used on previous layout when you want to use the product again

The first thing I want to talk about is keeping track of supplies used on a layout. Even if you don’t post in online galleries or submit your layouts to magazines, there still may be times when you want to go back to a layout and figure out what products were used.

The first step in keeping track of layout supplies is creating ‘meaningful’ layer names. Instead of the generic ‘Layer 1, Layer 2’ names that Photoshop and PSE provide, use the layer names to note which product was used on that layer. There are many different ways to create meaningful layer names.

Manually rename the layer – In PSE or Photoshop, you can double click on a layer name and manually edit the name. In Photoshop, you can right click and select ‘Layer Properties’ then edit the name in the pop-up box. In PSE, you can right-click and select ‘Rename Layer’, then edit the layer name in the pop-up box.

This option is useful for tracking things like fonts, brushes, styles or actions.

File>Place – Both Photoshop and Photoshop Elements have the ‘Place’ option, found under the file menu. Using File>Place is an alternative to opening and moving items onto a layout. File>Place allows you to open one file at a time, places it on your layout and uses the file name as the layer name.

This option is handy if you are only adding one item to a layout, but can be slow and cumbersome if you are putting multiple items on a layout.

Rename Layer – To use this script, open a product then run the script. The file name is used to rename the top layer in the file. When the product is moved to a layout, the file name is moved with it.

This option works great for layered PSD files. When you run the script, it only gives the top layer a ‘meaningful’ name, which is adequate for supply tracking purposes. When the multiple layers of the PSD file are moved to the layout the new layer name moves with it.
(More detailed instructions available here)

Copy & Close – This script makes quick work of putting many items on a layout and gives them meaningful names. To use this script, you open multiple jpg or png files, run the script, and the files are all copied to your PSD layout and file names are used as layer names. The jpg or png files are also closed after being copied.

This option is my favorite, by far, for putting items on a layout. You can use any method to open the files – File>Open, Picasa, Bridge, etc. Then run the script and it does the work of putting the items on your layout, renaming the layers and closing the files. (More detailed instructions available here.)

Here is a short video of each of these methods:

(I am just starting to play with a program called Jing for making recordings. So, bear with me while I work through the ins and outs of using it and get better at making quality videos! :) If you want the MPG4 version, you can download it here. It is much clearer than the embedded version here.)

(Click to Play the video)
From

Hope this helps you on your way to neat and tidy supply tracking! Still to come…tips on using Supply Tracker to gather up all your new ‘meaningful’ layer names and how to easily convert the list into useful information.

Sunday, April 25, 2010

Instructions - Scripts: Scatter Things - PSE

Why: To quickly copy, paste and randomly resize and scatter 3-dimensional items.

What: Scatter things will make up to 100 copies of one or more layers. Each layer will be randomly resized, rotated and scattered, based on some parameters entered into a pop-up window that appears when the script is run.

How: Scatter Things should be run from a new document containing only the layers/items that you want to be scattered.

Using the Script:
Create a new document in the size and shape you want your things scattered.

Add one copy of each ‘thing’ you want to scatter to your document.

If you would like your layers to have a layer style, like a drop shadow, you can add one before running the script and all of the copies will have the same layer style.


At this point, it is a good idea to save your document. Then, if you don’t like the way things are scattered, you can easily return to this point and try the script again. Because everything is random, you will get different results each time, even with the same settings in the pop-up window.

Double check that the only layers on your document are the ones you want to scatter. There should not be any background layers or blank transparent layers, only the layers you want to scatter.

Select one layer from your layers palette. It does not matter which layer you chose, they will all be scattered. Photoshop Elements simply requires one layer to be selected when an action is run, or you will get an error message that says ‘In order to use this effect, a single layer must be selected in the Layers palette.’

Run the script and this pop-up window will appear, giving you some scattering options


Number of Copies: Scatter Things will make up to 100 copies of each layer in the document. If you need more than 100 copies of something, simply run the script again.

If you are running the script for a second time on a document, be mindful of how many layers are currently on
the document and how many copies you want to make the second time. For example, if you start with ten original layers and make ten copies, you will end up with 100 new layers. If you run the script again and select 10 for the number of copies, you would end up with 1000 copies/layers!!


Size Variation: Scatter Things will vary the size of the copied items by up to 100%, larger and smaller, than
the original item. If you want all of the copied and scattered items to stay the same size, enter 0 (zero) in the
Size Variation field.


Angle Variation: Scatter Things will also rotate the copied items from 0 to 360 degrees, left and right. To leave items in their original orientation, enter 0 (zero) in the Angle Variation field.


Once you have your values set in the pop-up window, press OK and watch the script do its magic!


Note: If you ever need to exit the script once it is running, simply press the ESC key to stop it. 

When the script is finished, each copy is put on it’s own layer. Having each copy on its own layer allows you to modify the final results to your liking. 


All of the original layers are moved to the bottom of the layers palette and the visibility is turned off.


By default, the script allows parts of the layers to be off the edges of the document. If desired, you can quickly resize the layers to fit within the boundaries of your document by selecting all the layers and pressing Ctrl-T(Cmd-T) to transform them. (To quickly select all layers use Select>All Layers, or Select the top layer in the layers palette, hold the Shift and and select the last copied layer in the layers palette.)


Then, drag the transformation handles to resize the whole group to be within the document. Press Enter to accept the transformation.


If you want your ‘Scattered Things’ limited to a certain shape, create a new layer containing the shape that you want to make your scattered things. Place the layer below all o f the scattered layers and above the original, hidden layers and use it as a visual reference.


Press V to select your Move Tool.


Then check the ‘Auto-Select Layer’ option in the toolbar. Now, you can simply click on each layer and move or delete it as desired. For my sample, I moved all the flowers to inside the heart shape, leaving some of them over the edges of the heart.

Then, I deleted my heart layer, leaving a beautiful heart made of random flowers.


Other Ideas for the Scatter Things Script:

The Scatter Things script can also be used to just create a bit of randomness on items too.

Here is a sample of a title made from alphas, with the letters lined up neatly. Each letter is left on its own layer.

Select ONE of the layers in the layers palette and run the script.


If you set the Number of Copies to zero, the script will not make any copies, but will still randomly change the size and angle of the layers selected using the values entered in the Size Variation and Angle Variation fields.


Here is the ‘Scattered’ Title run at 20% Size Variation and 20% Angle Variation.


Photo Collages:
Scatter Things can also be used to make photo collages.

First, put a copy of each photo in a PSD. For this sample, I have 60 photos and simply put them on my page, one on top of the other.


Your photo sizes will probably be quite large, relative to your canvas size, so you will need to reduce them. How small to make them will depend on how many photos you are trying to collage and how big your canvas is. You may have to experiment a bit to get it just right.

To reduce all the photos at once, select all the photo layers. Then press Ctrl+T (Cmd+T) and drag one of the corner transformation handles down to the desired size. It does not matter if the pictures are in the middle of the canvas or not, as the script will scatter them anyway. (This is a great time to save or make a snapshot).

Here are the resized photos on a 12x12 canvas.


Select ONE of the photo layers and run the Scatter Things script with these options:


By choosing ‘1’ copy, the script will make a copy of each photo then resize, rotate and relocate them randomly.

Choosing a 50% size variation gives a variety of photo sizes - up to 50% bigger and smaller than the original. Set this value to ‘0’ (zero) to keep all the photos their original size.

Choosing an angle variation of 30 degrees keeps all the pictures somewhat vertical and right side up. A greater number can be entered if you prefer more variation in the orientation.

The script scatters the pictures randomly, based on the input values. When it is finished, you can add effects like a white stroke and drop shadow to each layer, if desired. You can also move and resize photos, to fill in any gaps and to make any favorites more prominent.

Here is the finished collage!

Friday, April 23, 2010

Instructions - Scripts: Scatter Things - Photoshop

Why: To quickly copy, paste and randomly resize and scatter items.

What: Scatter things will make up to 100 copies of one or more selected layers. Each layer will be randomly resized, rotated and scattered, based on some parameters entered into a pop-up window that appears when the script is run.

How: Scatter Things can be run from an existing layout or from a new document.

Using the Script:
Open an existing layout or create a new document. Add one copy of each ‘thing’ you want to scatter.

If you would like your layers to have a layer style, like a drop shadow, you can add one before running the script and all of the copies will have the same layer style.

At this point, it is a good idea to create a ‘Snapshot’ of your document. Then, if you don’t like the way things are scattered, you can easily return to this point and try the script again. Because everything is random, you will get different results each time, even with the same settings in the pop-up window.

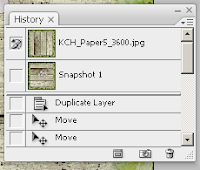
To create a snapshot, open the History palette using Windows > History. Click the New Snapshot button at the bottom of the History palette. The new snapshot is added to the list of snapshots at the top of the History palette. Clicking on Snapshot 1 in the history palette will return you to this state, should you not like the results after the script is run.


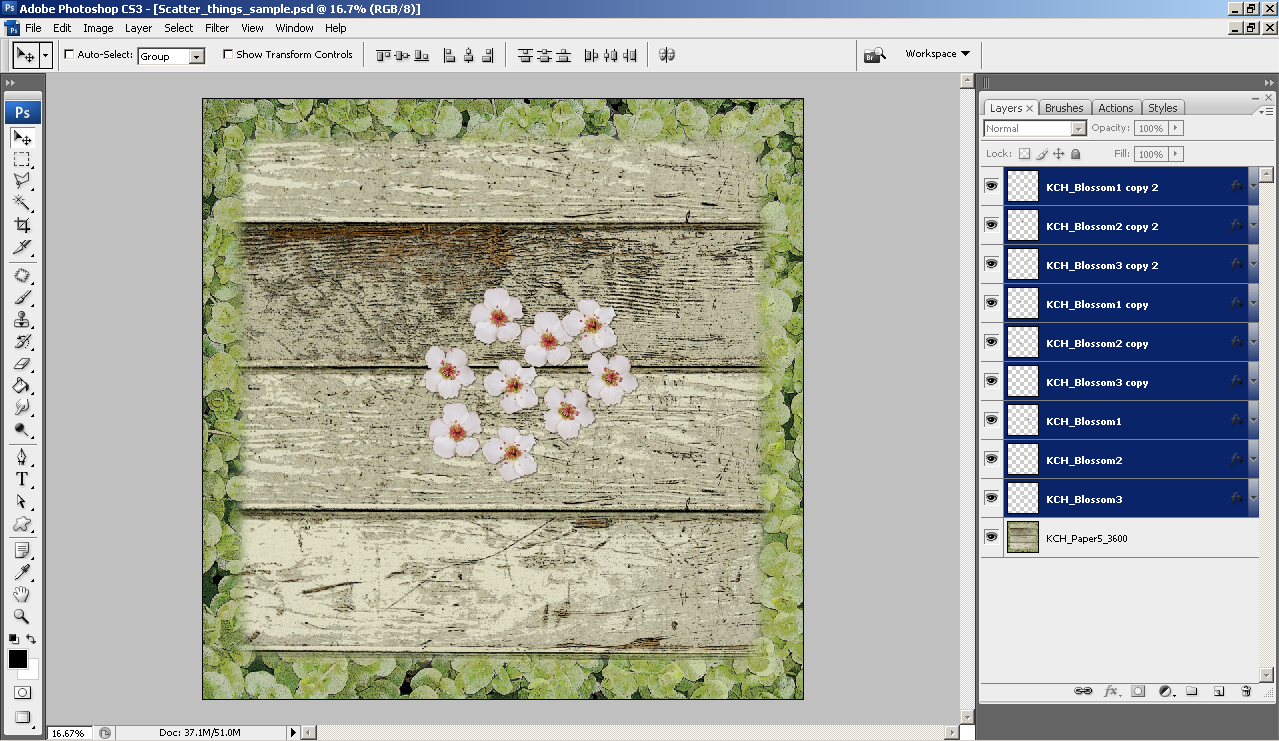
Select the layer or layers that you want scattered. If you are selecting more than one layer, hold the Ctrl key while you select multiple layers.
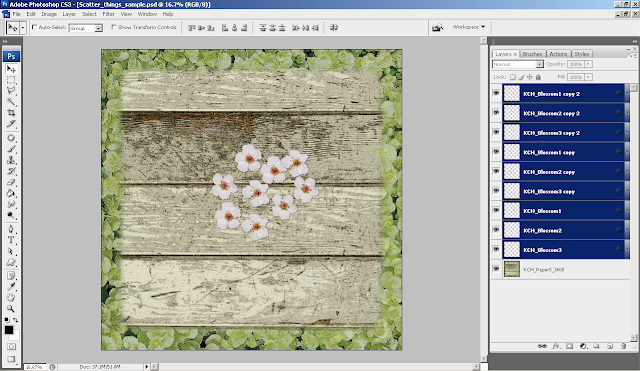


Run the script and this pop-up window will appear, giving you some scattering options.
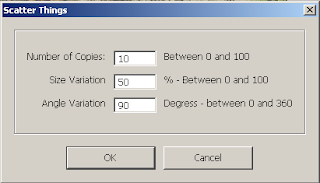


Number of Copies: Scatter Things will make up to 100 copies of each layer that is selected. If you need more than 100 copies of something, simply run the script again.

Size Variation: Scatter Things will vary the size of the copied items by up to 100%, larger and smaller, than the original item. If you want all of the copied and scattered items to stay the same size, enter 0 (zero) in the Size Variation field.

Angle Variation: Scatter Things will also rotate the copied items from 0 to 360 degrees, left and right. To leave items in their original orientation, enter 0 (zero) in the Angle Variation field.

Once you have your values set in the pop-up window, press OK and watch the script do its magic!

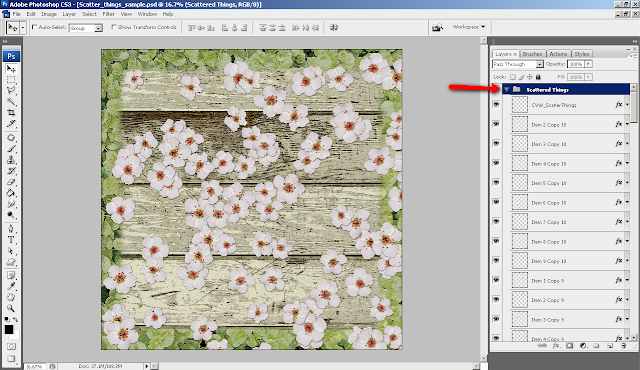
When the script is finished, each copy is put on it’s own layer in a layer group called ‘Scattered Things’. Having each copy on its own layer allows you to modify the final results to your liking.


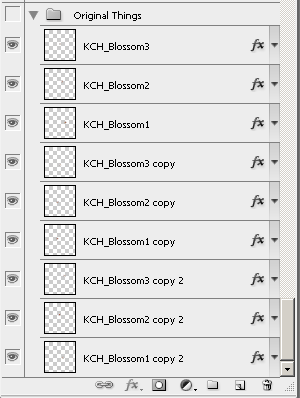
All of the original layers are moved to a layer group called ‘Original Things’ and placed at the bottom of the layers palette. The visibility of the layer group is turned off.


By default, the script allows parts of the layers to be off the edges of the document. If desired, you can quickly resize the layers to fit within the boundaries of your document by selecting the ‘Scattered Things’ group layer and pressing Ctrl-T (Cmd-T).
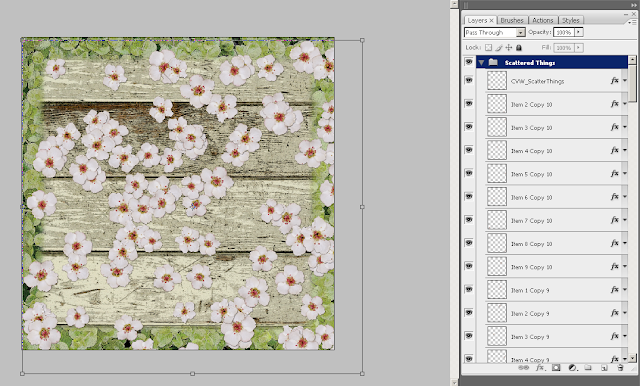


Then, drag the transformation handles to resize the whole group to be within the document.
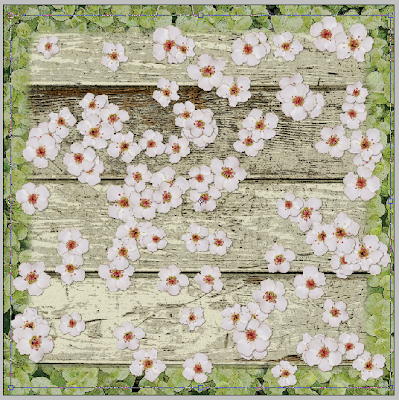


If you want your ‘Scattered Things’ limited to a certain shape, create a new layer with your shape on it. Place the shape layer below the scattered layers. This will give you a visual reference for moving or deleting things that are outside the desired shape.

Note: The reference layer will be deleted once you are done, so it can really be anything, a shape, a background paper, embellishment, etc., anything that gives you a visual reference for your desired shape.
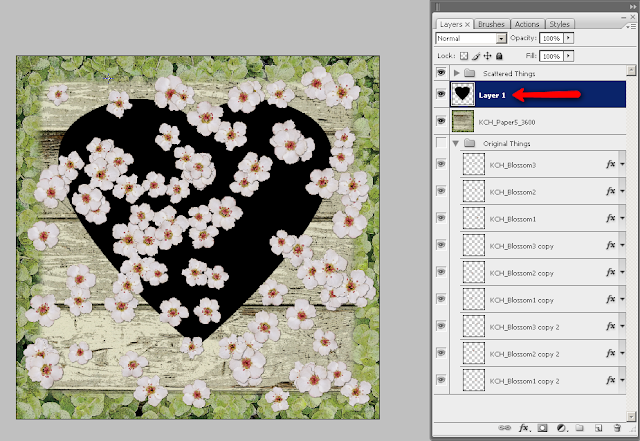


Press V to select your Move Tool. Then, make sure ‘Layer’ is selected in the ‘Select Group or Layer’ dropdown.
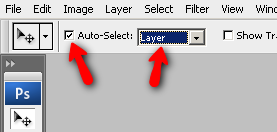


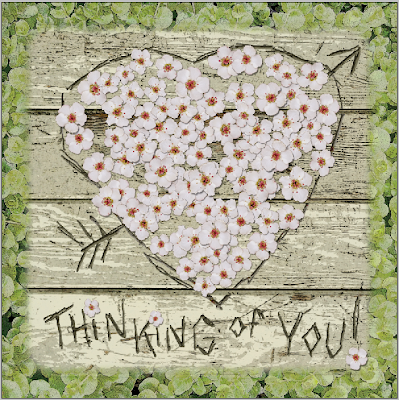
If you check the ‘Auto-Select’ option, you can simply click on each layer and move or delete it as desired. For my sample, I moved all the flowers to inside the heart shape, leaving some of them over the edges of the heart.
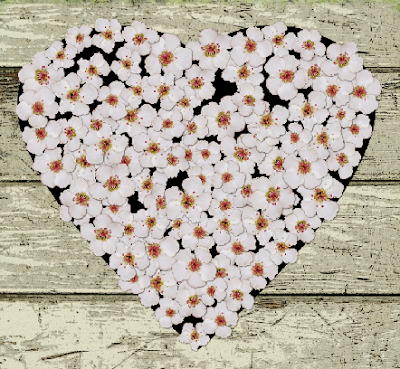


Then, I deleted the heart ‘reference’ layer, leaving a beautiful heart made of random flowers.
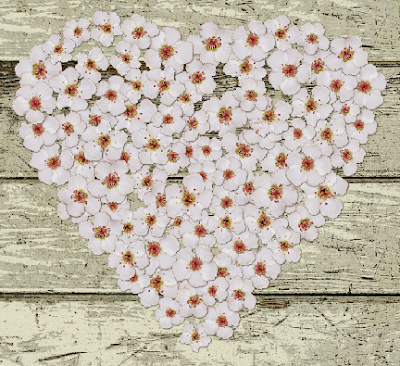


Other Ideas for the Scatter Things Script:

The Scatter Things script can also be used to just create a bit of randomness on items too.

Here is a sample of a title made from alphas, with the letters lined up neatly. Each letter is left on its own layer.

Select all the layers in the layers palette and run the script.



If you set the Number of Copies to zero, the script will not make any copies, but will still randomly change the size and angle of the layers selected using the values entered in the Size Variation and Angle Variation fields.
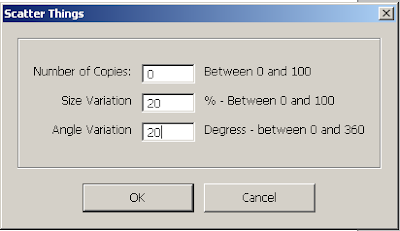


Here is the ‘Scattered’ Title run at 20% Size Variation and 20% Angle Variation.



Photo Collages:
Scatter Things can also be used to make photo collages.

First, put a copy of each photo in a PSD. For this sample, I have 60 photos and simply put them on my page, one on top of the other.

16

Your photo sizes will probably be quite large, relative to your canvas size, so you will need to reduce them. How small to make them will depend on how many photos you are trying to collage and how big your canvas is. You may have to experiment a bit to get it just right.

To reduce all the photos at once, select all the photo layers. Then press Ctrl+T (Cmd+T) and drag one of the corner transformation handles down to the desired size. It does not matter if the pictures are in the middle of the canvas or not, as the script will scatter them anyway. (This is a great time to save or make a snapshot).

Here are the resized photos on a 12x12 canvas.
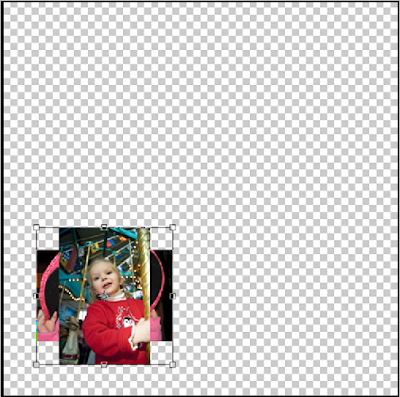


With all the photo layers still selected, run the Scatter Things script with these options:
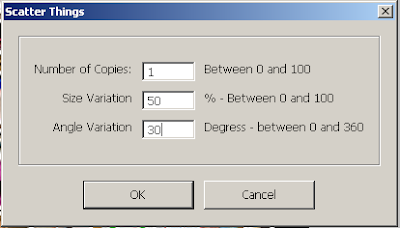


By choosing ‘1’ copy, the script will make a copy of each photo then resize, rotate and relocate them randomly.

Choosing a 50% size variation gives a variety of photo sizes - up to 50% bigger and smaller than the original. Set this value to ‘0’ (zero) to keep all the photos their original size.

Choosing an angle variation of 30 degrees keeps all the pictures somewhat vertical and right side up. A greater number can be entered if you prefer more variation in the orientation.

The script scatters the pictures randomly, based on the input values. When it is finished, you can add effects like a white stroke and drop shadow to each layer, if desired. You can also move and resize photos, to fill in any gaps and to make any favorites more prominent.

Here is the finished collage!

Wednesday, April 21, 2010

Instructions - Scripts: Supply Tracker

Before using the script, it must be installed. See the Instructions Page for detailed information on installing scripts in Photoshop and PSE.

Why: To simplify tracking of supplies used on a layout.

What: Copies layer names from a PSD into a list that can be easily edited and used for tracking supplies. Puts the list into the PSD File Info (Meta Data) and adds a 'Credits' text layer to the PSD.

What Else:
● Gets layer information from groups and nested groups.
● Does not record Group names.
● Sorts collected layer names into alphabetical order, making it easy to find and eliminate duplicates from the list.

How: This script works best when each layer in a PSD has a meaningful name, such as the file name of a product. Layer/Product names can be typed in as you go or File>Place can be used to automatically name the layer. The Rename Layer script also works great for renaming layers of items prior to moving them onto a layout. The Copy and Close script will also add the layer names for you when as it copies items to a PSD.

Using the Script:


When the script is run a dialog box will appear giving you an option to include 'Visible Layers Only'. Leave this box checked if you want only visible layers to be included in the supply list. Remove the check mark and the script will include all visible and non-visible layers in the supply list.


Tips for Using Supply Tracker:
1. Use 'Visible Layers Only' to keep non-visible layers from being listed in the credits.
2. Rename Text layers with the font used to include them in credits list.
3. Layer Groups/Names will not be included in credits list.
4. Using File>Place automatically names the layer for you and creates a smart object.
5. Copy and paste brush, action and style names to layers immediately after using (to prevent forgetting later).
6. If a layer uses a brush and a style or action, simply include both in the layer name and edit the credits list after running the script.


When finished, Supply Tracker creates a new text layer at the top of your PSD called 'Credits' containing the list created from the layer names. This list can easily be edited in Photoshop or copied and pasted to the software of your choice for editing. The same list is also pasted in the Description section of File>File Info.


Additional tip: After using the 'Credits' layer to modify and clean up your supply list, copy and paste the updated version to File>File Info – Description so that the modified list will be saved to any JPG files created from the original.

Supplies used in sample layout from:
Christy VanderWall
Acrylic Rainbow Cooties
Good Times
Rainbows and Sunshine
Actions from Atomic Cupcake

Instructions - Scripts: Rename Layer

Why: To simplify tracking of supplies used on a layout.

What: Copies the file name of an item to the layer name. When the item is moved onto a layout, the layer name (file name) is copied also.

How: Open a file and run Rename Layer before moving the item to your layout.

Using the Script:

When you open a file in Photoshop, or PSE, the layer name is usually something like 'Layer 0'.


When you move the item to a layout in Photoshop (or PSE), it is given a generic layer name, like 'Layer 1' which is not helpful later when trying to track your supplies.


When you open a file and run Rename Layer, the file name becomes the layer name.


When you move the renamed item to a layout, the layer name moves with it. This makes it easy to track the items used on a layout when the layout is finished.


Tip: If you are using a layered PSD file and want to move it to your layout, you can still run Rename Layer before moving the layers. Rename Layer will only rename the top layer of the multi-layer file.